Quickstart — Syncor Alt
Welcome! This quickstart gets you up and running with Syncor Alt’s core flow in minutes: scan your store, create a bulk alt-text task, review results, and understand settings and credits.
Before you start
- Make sure Syncor Alt is installed in your Shopify store and has the permissions to read product images and write product image alt text.
- New installs include 50 free credits so you can test without buying credits.
Table of Contents
1.) Scan your store
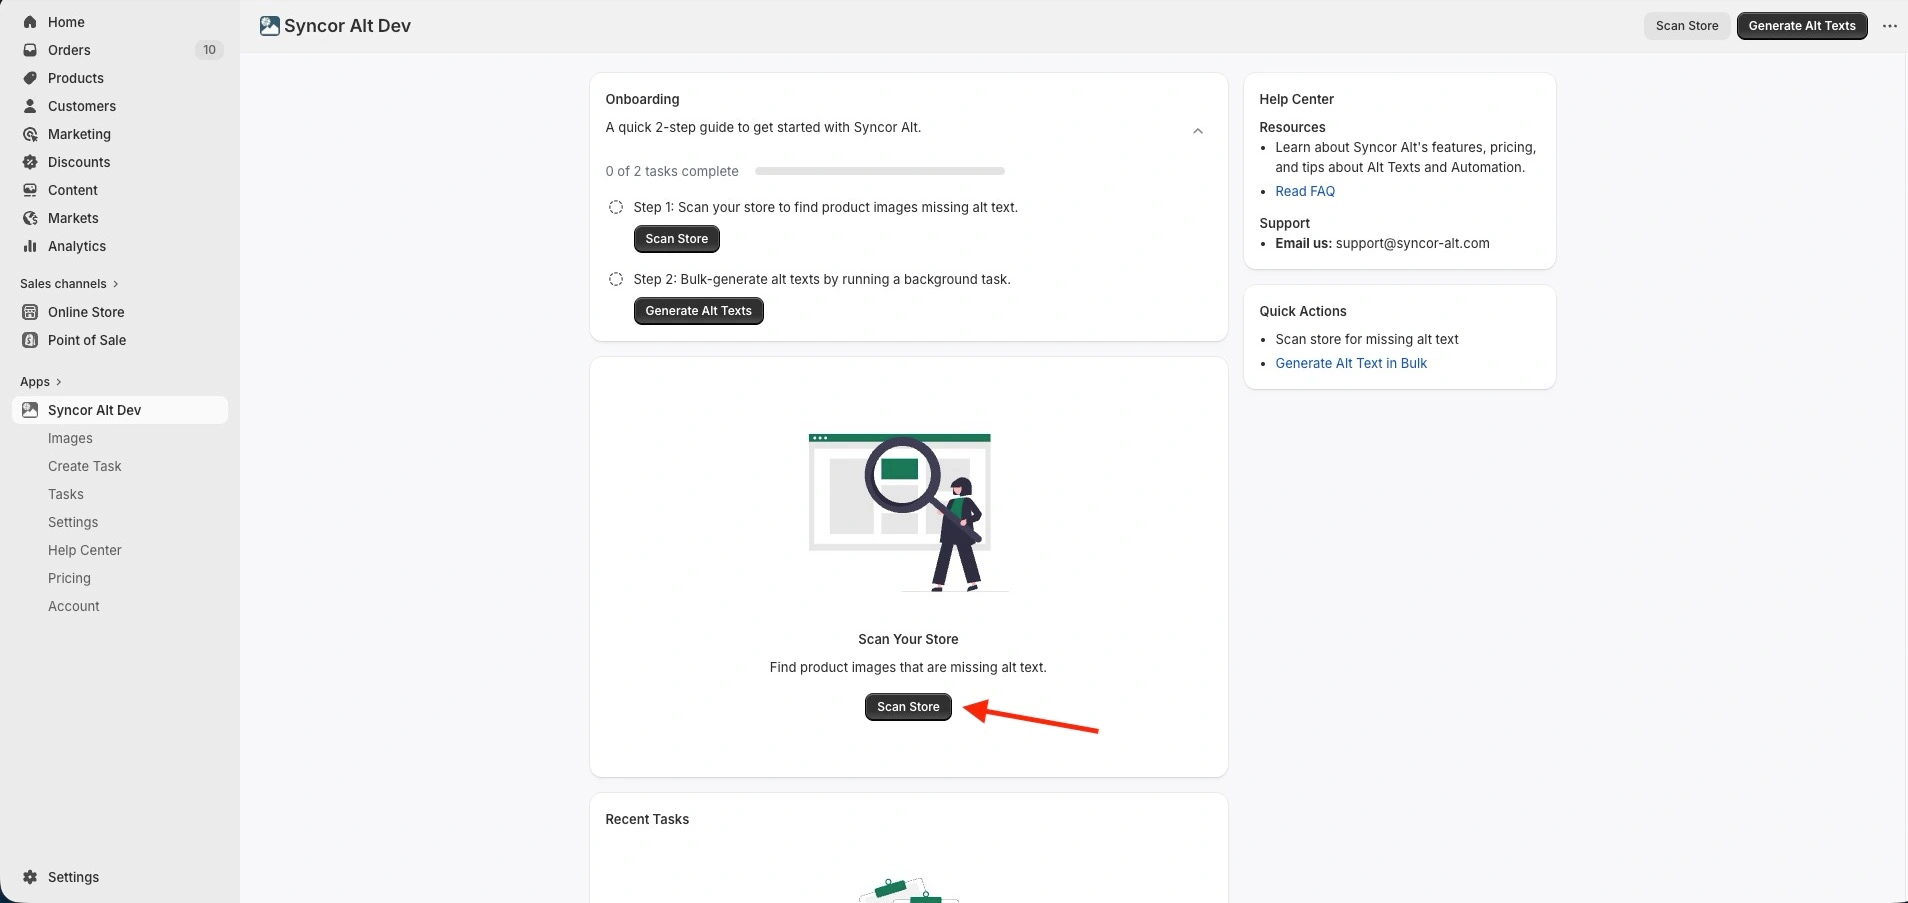
- Open the Dashboard in the app.
- Click Scan Store.
- Syncor Alt will scan all product images and check their current alt texts.
- When the scan finishes you’ll get a simple Alt Text Coverage report showing how many images have alt text and how many are missing — use this to prioritize tasks.
Why scan first?
The scan gives you a baseline so you know where to focus your alt-text generation (e.g., missing alt texts vs. all images).
2.) Create a bulk alt text generation task (quick test)
You can start alt text generation by clicking Generate Alt Texts (or go to Create Task page).
Quick test steps (recommended for your first run):
- Click Generate Alt Text (or go to Create Task page).
- Name the task — either type a name or click Auto-Generate Name.
- Under Preferences & Scope:

Create Task: Preferences and Scope, and Autosave - Set Scope to All Images (this lets the generator run regardless of whether an image already has alt text).
- Disable Autosave (so you can review before applying).
- Under Product scope, choose Selected Products → click Add Product and pick 1–2 products (keeping the scope small is cheaper and ideal for testing).

Create Task: Preferences and Scope, and Autosave
- Leave other settings at their defaults and click Save.
Tip: testing with 1–2 images helps you evaluate the quality before spending many credits.
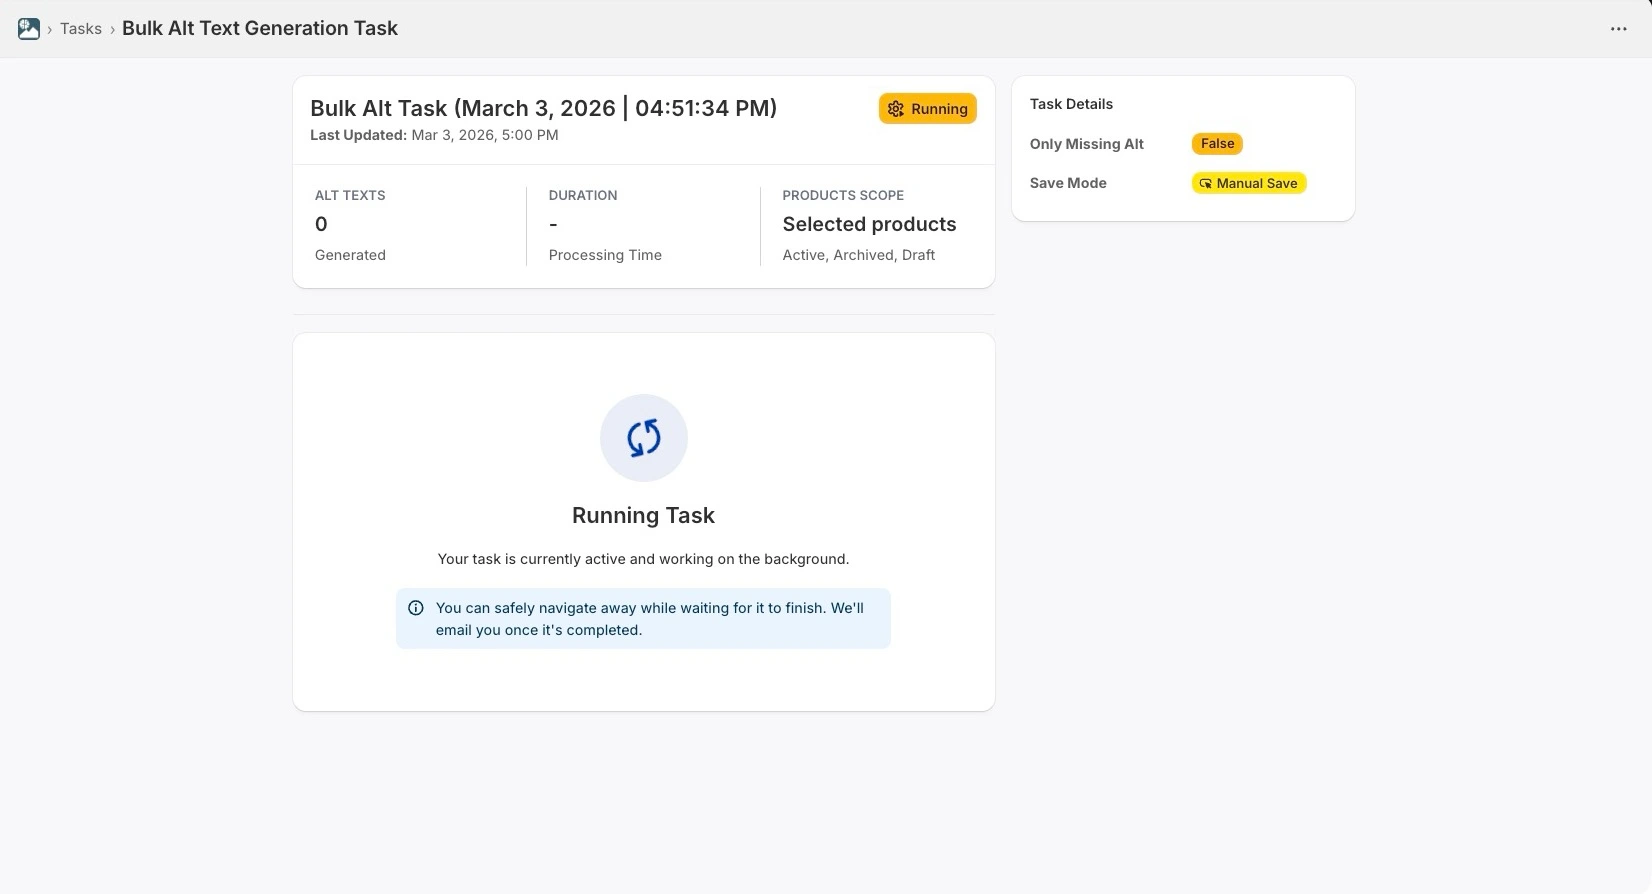
3.) Task queue & background processing
- After saving you’ll be redirected to the Task page.
- Each task is queued and runs in the background — you may safely navigate away while it runs.
- We’ll send you an email notification when the task finishes.
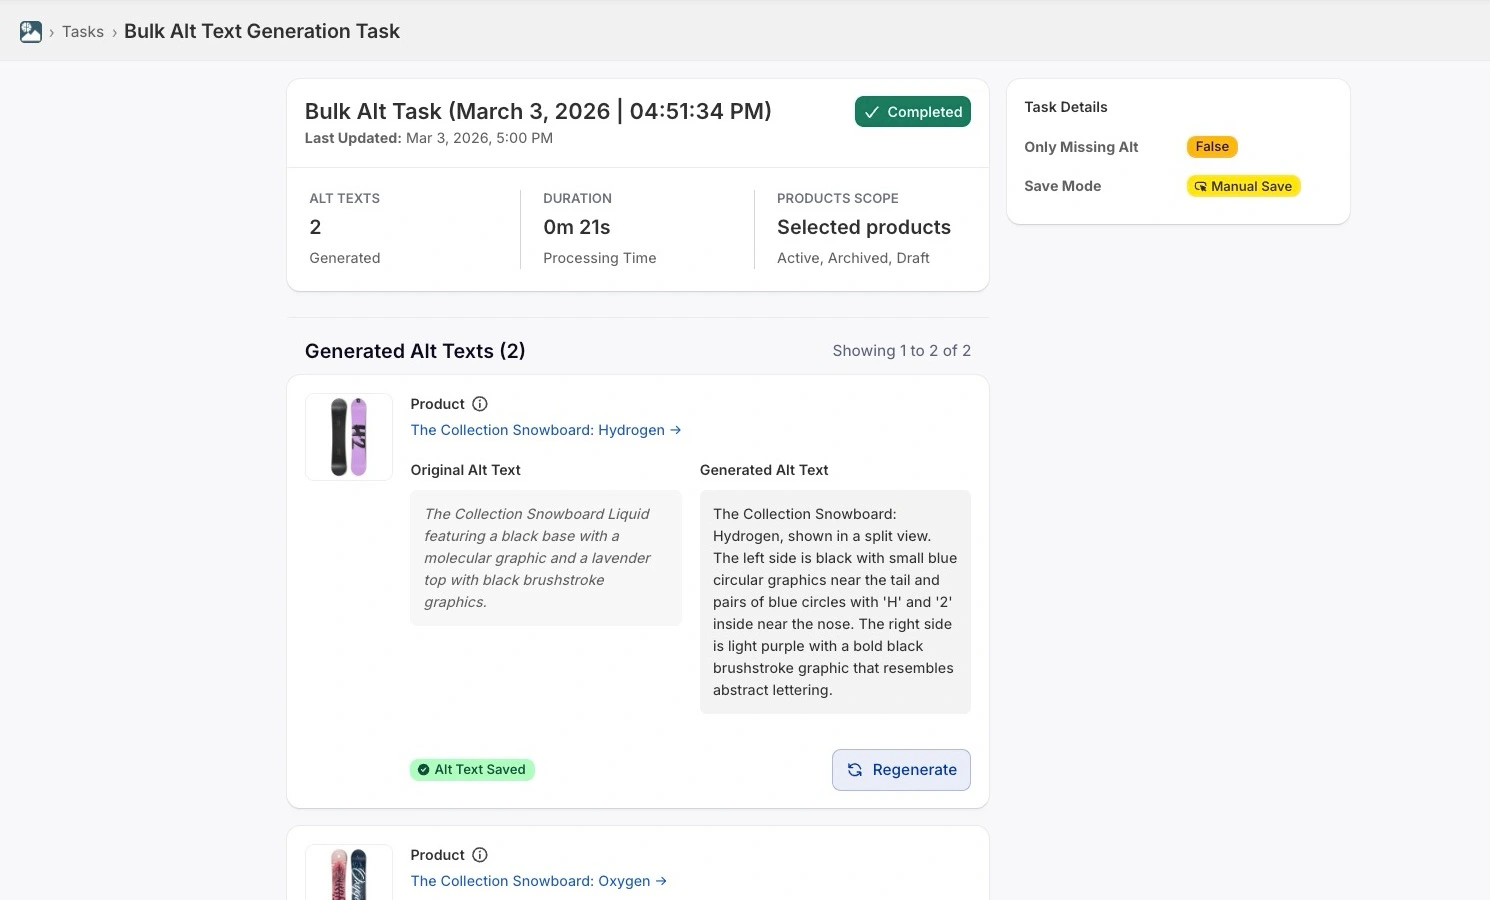
4.) Review results & apply changes
On the Task page you can:
- See the task parameters you chose (scope, name, autosave status, etc.) and the current status (Pending / Active / For Review / Completed / Failed).
- View an overview of images the task processed, with a side-by-side comparison of Original vs Generated alt texts.
- Regenerate any individual alt text if you want an alternative phrasing.
- If you disabled autosave, use Apply all alt texts to save all generated alt texts to your store at once (you’ll be asked to confirm).
- If autosave was enabled when you created the task, the generated alt texts are automatically saved to your store — no extra step needed.
- Click any image to open a review panel for single-image inspection and edit.
5.) Settings (overview)
Settings are split into two areas:
Alt Text Generation
Controls the app-wide defaults for task behavior. These defaults are used when you create new tasks.

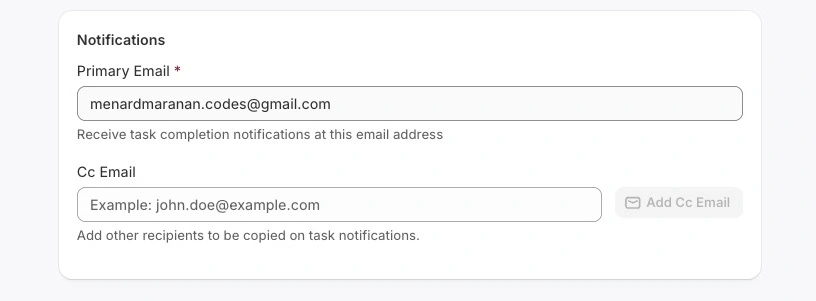
Notifications
Set who receives email notifications when background tasks complete (useful if multiple team members should be informed).
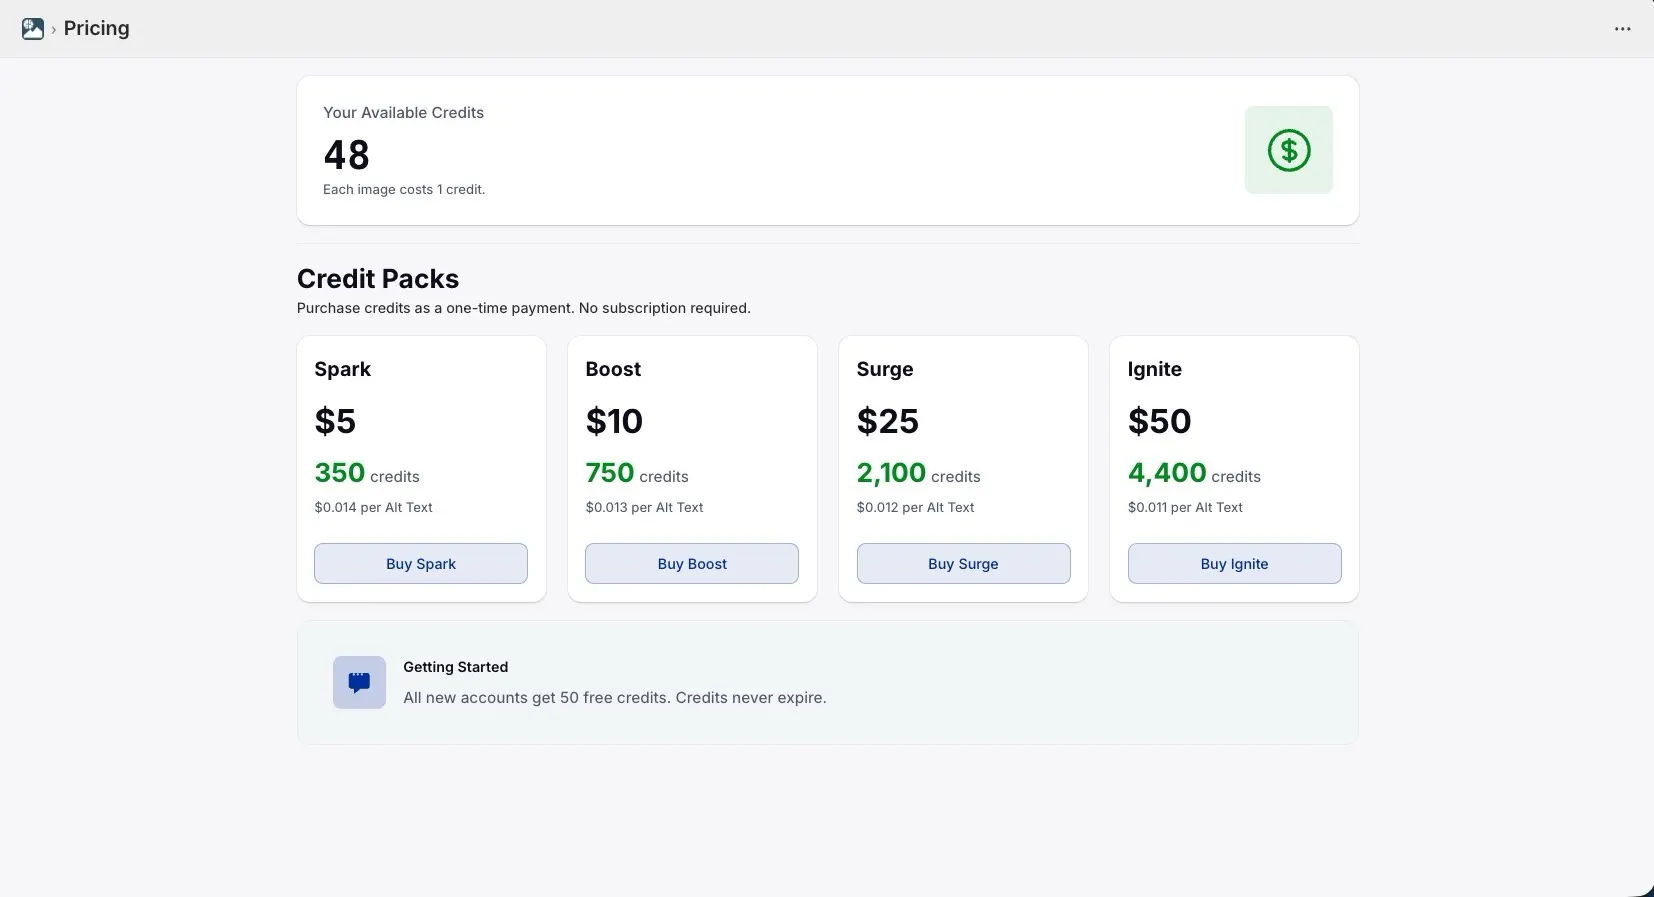
6.) Credits system
- 1 generated alt text = 1 credit.
- 50 free credits on first install.
- Credits are purchased as one-time credit packs (no recurring/subscription plans).
- To conserve credits while testing: keep task scope limited (1–2 products or images) and disable autosave to preview before applying.
Where to check credit balance: see your account / dashboard (credit balance is shown there).
Troubleshooting & tips
- If results don’t match expectations, regenerate the alt text for that image or tweak the task preferences and re-run on a small sample.
- Use Selected Products to test a narrower set before running a large task.
- Disable Autosave on first runs so you can confirm output before writing to Shopify.
- If a task fails or is stuck in queue, check your notification emails for details and then re-run the task or contact support.
Next steps
This quickstart covered the fast path: scan → create small task → review → apply. For a deeper walkthrough on crafting task templates, per-product rules, and advanced preferences, see the detailed Creating Alt Texts tutorial.